
Access the OmniVista Admin Center
-
Using any one of the node IP addresses (ex:10.35.x.y) with port 3000, open the Admin Center UI:
https://<node-IP>:3000.
If you configured an IPv6 interface, you can also access the Admin Center using the IPv6 address, for example: https://[2001:df4:2900:71::139]:3000.
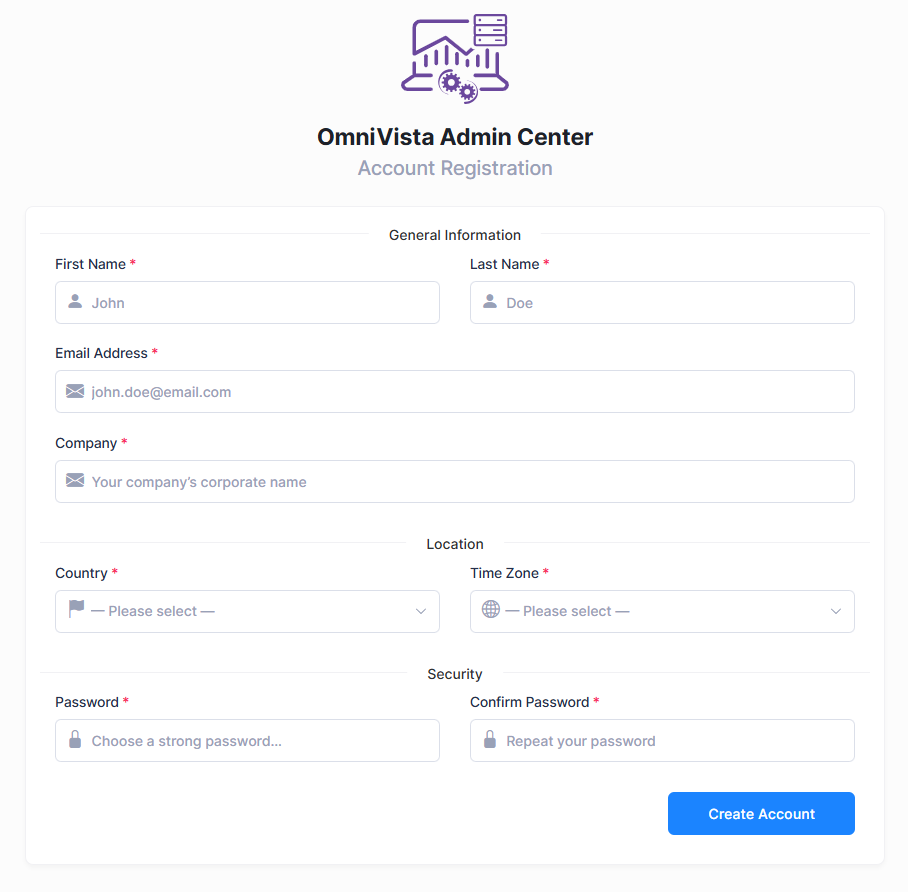
-
Enter all the required information and click Create Account.
The username (email) created here will be used as the default account for logging in to the Admin Center UI at myovterra.myovcloud.com. The default password is changeme.
-
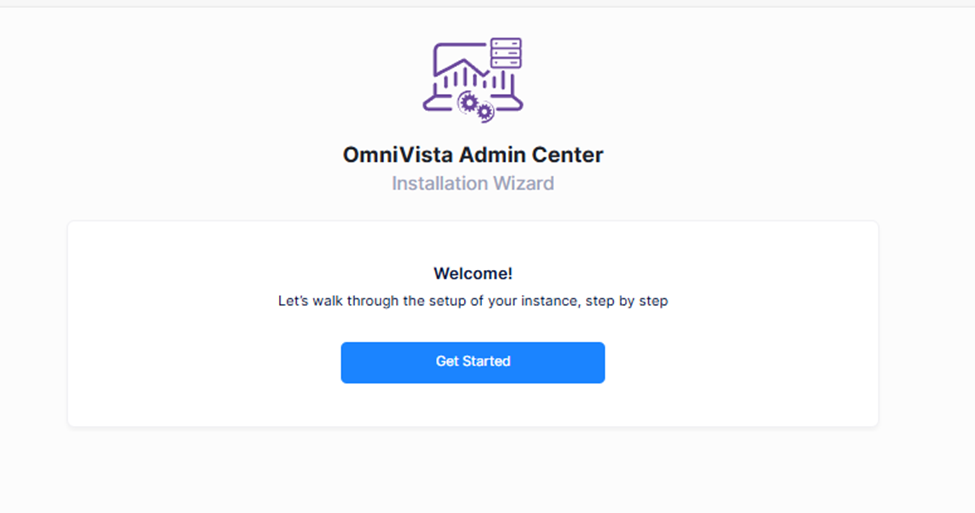
After receiving a successful message the Installation Wizard page will open. Click on Get Started to configure the cluster.
Configure the Cluster
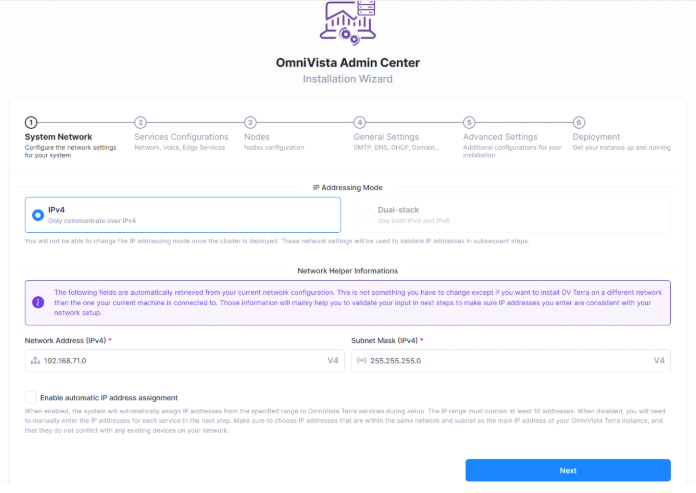
Step 1 - System Network
The network subnet will be detected automatically through the node IP configured during first boot.
-
Confirm the detected network address and subnet mask.
-
Click Next.
Step 2 - Services Configurations
-
Select the Expected number of APs and Expected number of Switches in the Network tab.
-
Upload the release file in the Network Release File section. Click Upload Release File to select the file and start the upload.
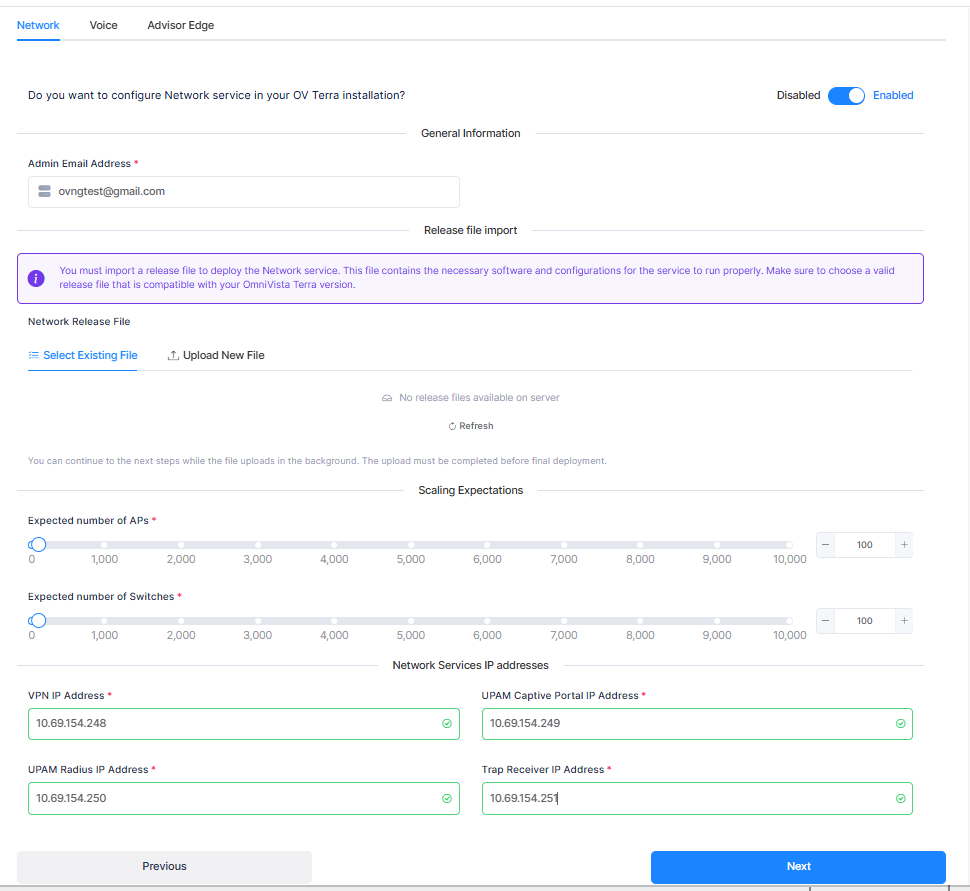
Make sure the upload is completed before final deployment. Do not click Install until the release file status reads Uploaded.
-
Configure the Network Service IP addresses and click Next.
-
VPN IP Address - Dedicated IP for the VPN service.
-
UPAM Captive Portal IP Address - Dedicated IP for the UPAM Captive Portal service.
-
UPAM Radius IP Address - Dedicated IP for the UPAM Radius service.
-
Trap Receiver IP Address - Dedicated IP for the Trap Receiver service.
Step 3 - Nodes
-
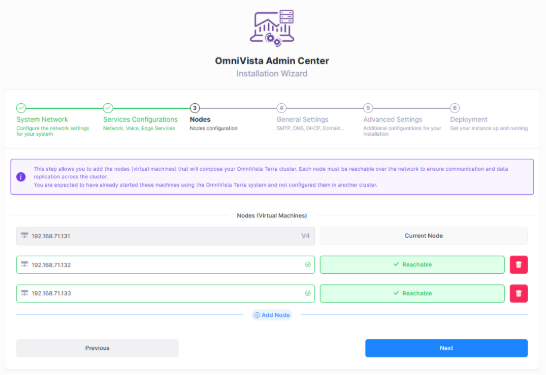
Add the nodes (virtual machines) that will compose your OmniVista Terra cluster.
-
Enter the node IP address of each VM and click Check—nodes should be Reachable.
-
Click Next.
Step 4 - General Settings
-
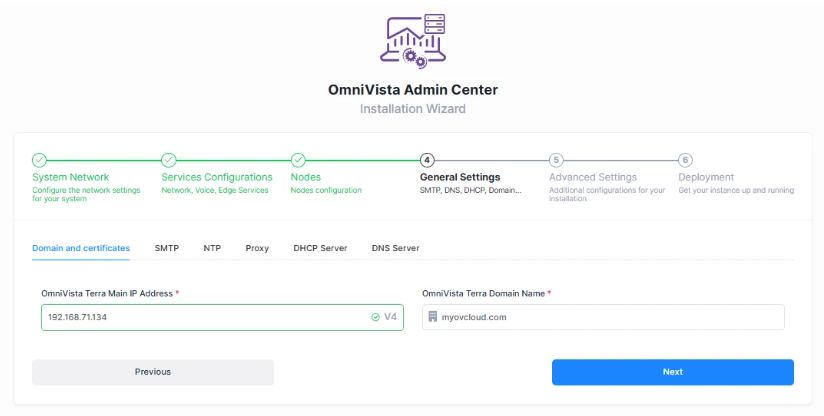
Configure the OmniVista Terra Main IP Address and the general settings: SMTP, DNS, DHCP, and other tabs as required.
Configuring the DNS settings is mandatory during a fresh installation of OmniVista Terra. Do not skip this step in the installation process.
-
Click Next.
The OmniVista Terra Main IP Address:
-
Cannot be the same as the IP address for the main node.
-
Is the UPAM IP address that third-party devices or external services use to connect to the embedded OmniVista Terra RADIUS Server.
-
All IP addresses specified should be unique and different from the node IPs.
Step 5 - Advanced Settings
-
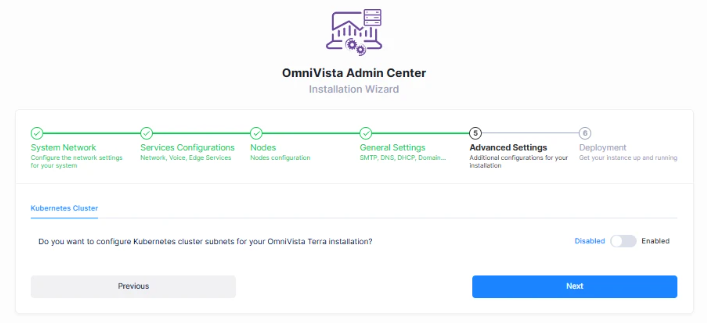
Review the Advanced Settings. Keep the Kubernetes cluster subnet configuration disabled unless you need custom Kubernetes subnets.
-
Click Next to proceed to Deployment.
Start and Monitor the Installation
Review and Start
-
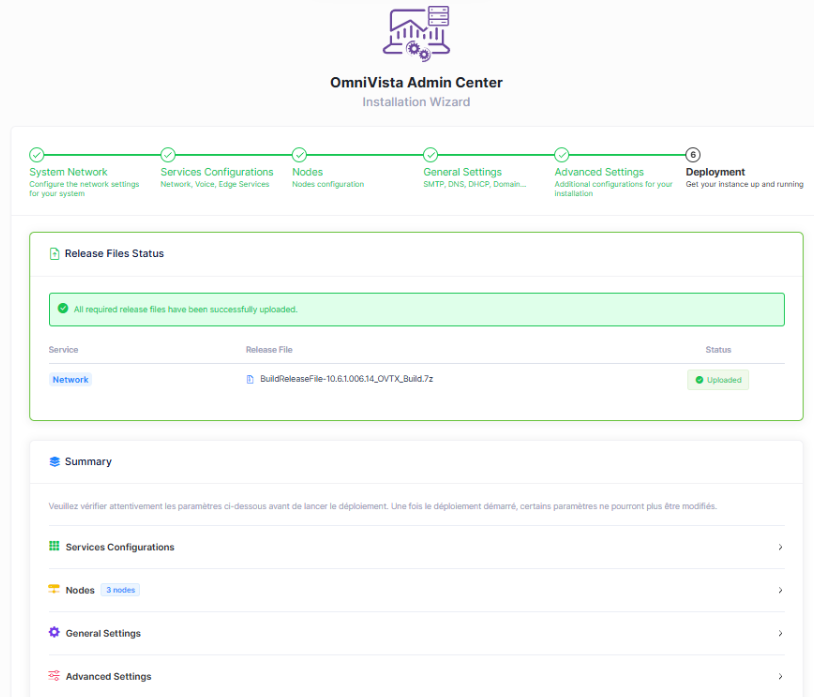
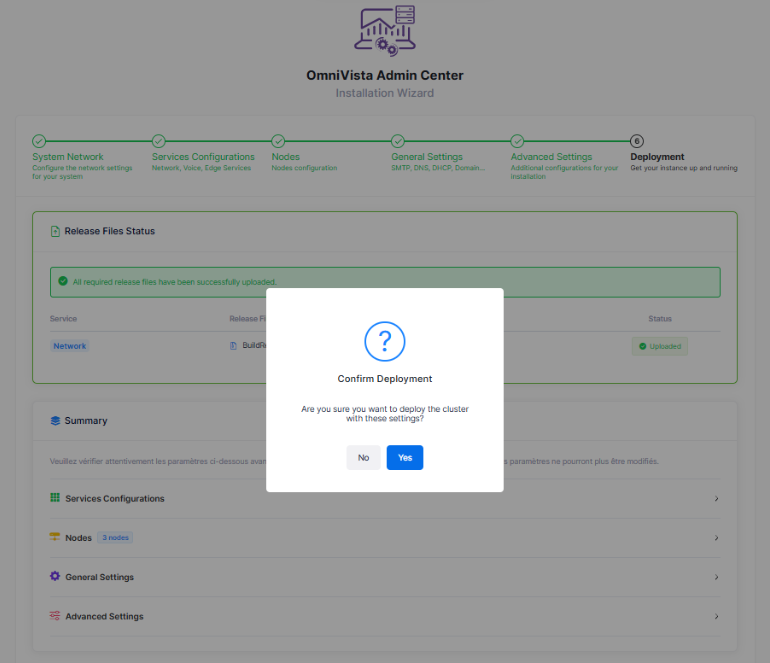
You can review the entire configuration in “Step 6: Deployment”. Confirm all the release files are uploaded and review the summary. Click Install to start the installation process.
-
A confirmation popup appears. Click Yes to start.
Monitor Progress
-
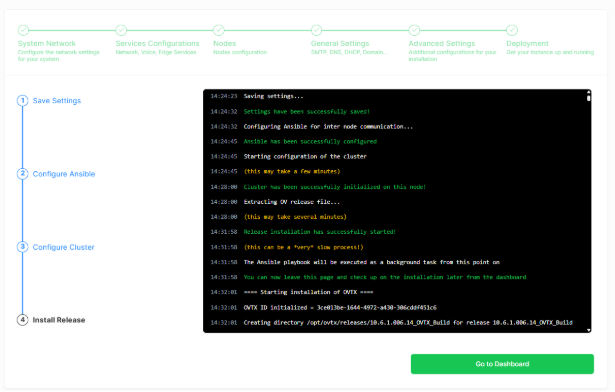
Click Go to Dashboard to access the Dashboard page of the Admin Center.
-
Wait until the deployment is finished. You can refresh the same Admin Center URL after some time. If a login page appears, enter your username and password.
-
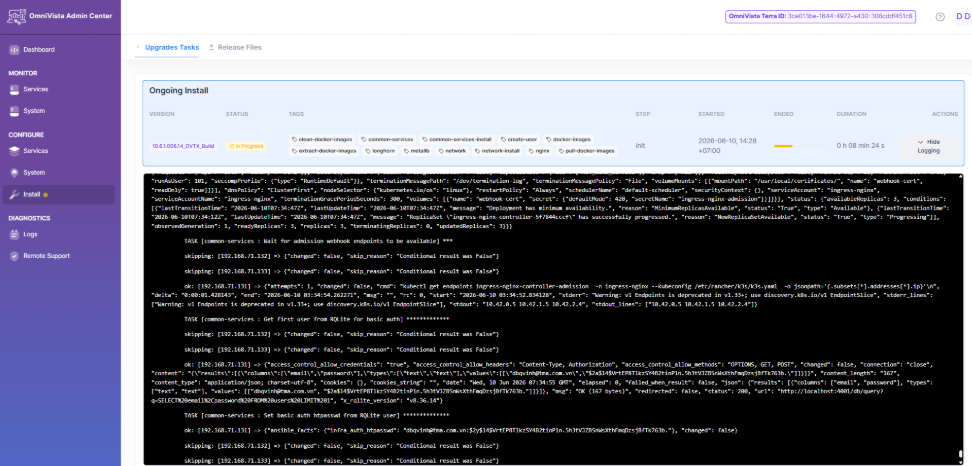
Click Install on the left side of the screen. You can view the installation logs in real time.
-
Check the status of the deployment: “Success”, “Failure”, or “In Progress”.
If the initial installation fails, click Install again—usually the next attempt succeeds.
-
If the deployment fails, click Download Logs—the log file is downloaded and you can review the error details inside.
Verify the Installation
Check Node and Pod Status
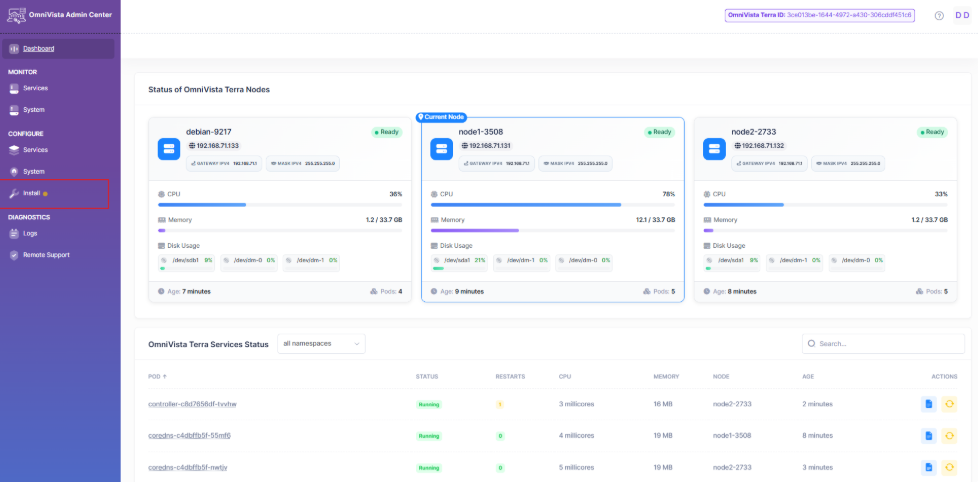
Check the pods status from the dashboard screen. Verify that each node shows “Ready” and that the pods listed under “OmniVista Terra Services Status” show a “Running” status.
Update the Hosts File
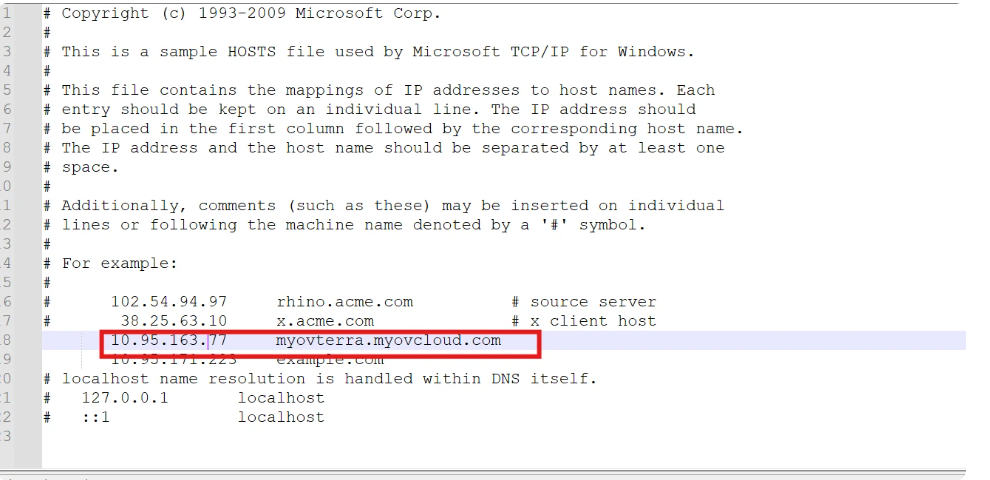
Update the hosts file (C:\Windows\System32\drivers\etc\hosts) on your computer with myovterra.myovcloud.com and the OmniVista Terra Main IP address.
-
Open
C:\Windows\System32\drivers\etc\hostsin a text editor running as Administrator. -
Add the following line:
<OmniVista-Terra-Main-IP> myovterra.myovcloud.com
You can now log in to OmniVista Terra at https://myovterra.myovcloud.com using the email configured during account registration. The default password is “changeme”.